Table of Contents
Sooner or later, every homeowner or landlord will have to deal with a hole or gouge in the sheet rock that needs a patch. Maybe you let the door go too quickly and it went through the wall, or you had an electrician come in and need to remove a section of the wall to get to your wiring.
Your dog didn’t turn in time and hit the wall, or you had a kid that was practicing karate. Whatever the reason, you now have to patch this hole.
If you’ve never patched a hole in drywall before, you may not know where to start. The good news is that it’s relatively easy to make a solid and lasting repair that looks like the hole never happened in the first place.
You don’t need a kit, and you don’t need any special tools. You’ll just need some joint compound, window screen, common tools, and a drywall scrap. We’ll break down each step so it’s easy to follow if you have your own accident with the drywall and need to repair it.
1. Cut Your Patch
The first step in repairing the drywall is to cut out your patch. Go look for a scrap of drywall that has the same thickness level of the damaged wall. If you don’t have any, call a local drywall franchise or take a visit to your local hardware store and see what they have.
Measure and cut out a square patch that is big enough to cover the existing hole.
Once you cut your patch, hold it over the hole and use a pencil to lightly trace an outline. Above the hole, draw a light X on the wall. On the patch itself, draw an arrow that points up toward the patch.
These drawings will help you orient the patch in the correct direction a few steps down.
2. Prepare the Damaged Wall
The next step is prepping the damaged wall for your patch. To start, get a drywall saw and cut the wall from the edge of the existing hole to the corners of your penciled outline. Use a utility knife and score along the outline’s edge.
This will weaken the drywall, and you can snap pieces off inside your outline. When you get close to an edge, cut each one free using your utility knife to get a clean edge.
3. Add a Piece of Strapping
When you get all of the pieces removed and have a clean area to start your patchwork, it’s time to add strapping. Strapping is a piece of wood that will support your drywall patch.
Get a piece of 1×3 wood and cut it so it’s six inches longer than the hole is high. On one side of the strapping, apply beads of construction adhesive. Carefully insert it into the hole, and make sure your adhesive faces out.
Without touching the wet adhesive, pull the strapping up tight to the drywall. Add to screws using a staggered pattern in each end of the strapping, driving them through the damaged drywall. When the screw heads are just below the wall’s surface, stop them.
4. Adhere Your Patch
Now it’s time to attach your patch you cut in step one. Find the arrow on the patch and align it with the X you drew on the drywall. Carefully but firmly press the patch against your strapping.
It’ll adhere to the construction adhesive. Get two screws and drive them in a staggered pattern through the patch and firmly into the strapping. This will ensure the patch doesn’t move.
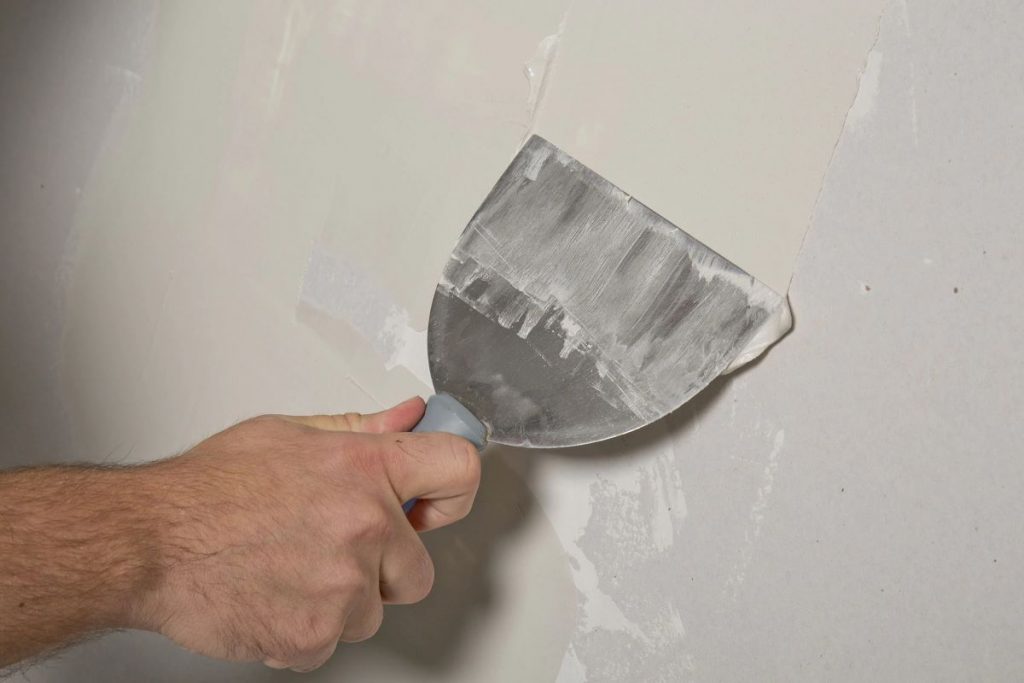
5. Apply Joint Compound
You want to make the seams around the patch disappear so you get one continuous flat surface between the wall and the new patch. Get your joint compound and a six-inch taping knife.
Apply a thin layer of the joint compound over the patch, and pay close attention to the screw heads and the seams. Don’t apply a thick layer because this will take much longer to dry.
6. Apply the Screen
Before your first layer or joint compound dries, get your window screen and cut it so it’s a few inches longer and wider than your patch. Use your trowel and press the screen into the joint compound.
7. Cover the Seems and Apply Your Final Coat
Take another thin layer of joint compound and apply it over the screen and patch. Start in the middle and work your way outwards. Give in 24 hours to dry. Apply the final thin coat, and go at least six inches around the edge of the previous coat.
Sand it with fine sandpaper after it dries 100%. Wipe the dust away and paint the wall to match your existing color.
resource: patchmasteropportunity.com